Are you tired of the repetitive task of copying and pasting blocks and other AutoCAD objects from one drawing to another? Well, I’ve got great news for you! In this post, I’m going to introduce you to the LazyLibrary command, a powerful tool that will revolutionize your workflow in AutoCAD. With this command, you can effortlessly insert your custom library of blocks, dimension styles, multi-line styles, and more into your current drawing. Let’s dive in and explore how to use this time-saving feature.
Step 1: Create a New Drawing
To start using the Lazy Library command, we first need to create a new drawing. Simply click on the AutoCAD logo in the top corner and select “New Drawing.” Choose the appropriate template based on your unit system, such as Imperial or Metric. In the new drawing, delete any unnecessary information and switch to the model tab.

Step 2: Prepare Your Library Drawing
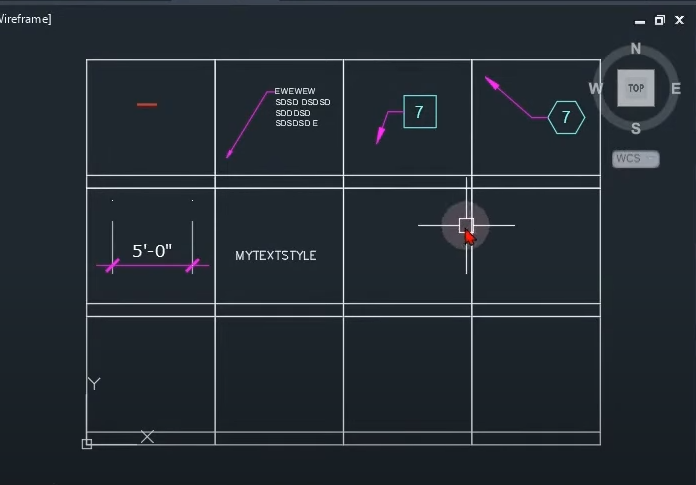
Now, it’s time to organize and store your AutoCAD objects, such as dimension styles, multi-line styles, and blocks, in a separate library drawing. Open your library drawing and make sure it contains all the elements you want to insert into your current drawing.
Step 3: Setting up the Lazy Library Command
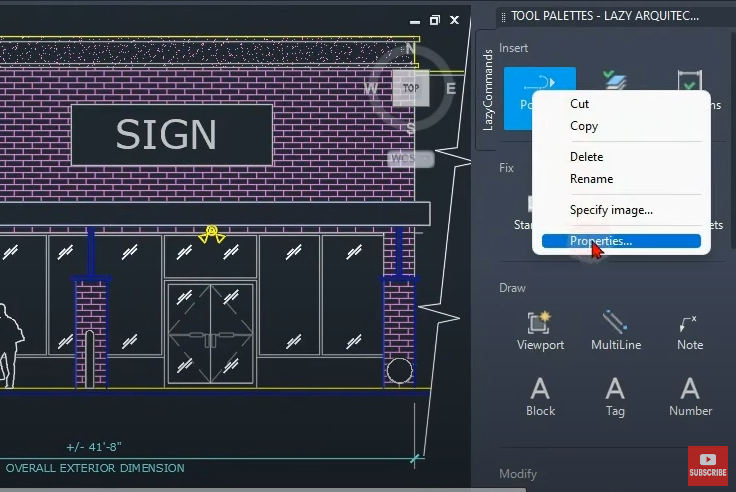
We’ll utilize the tool palette to create the Lazy Library command. Press “Ctrl + 3” on your keyboard to open the tool palette. If you prefer, you can use command macros, but for simplicity, we’ll focus on the tool palette method. Follow these steps:
- Draw a simple rectangle in the tool palette.
- Select the rectangle, right-click, and choose “Properties.”
- Name the command as “LazyLibrary” or any other desired name.
- Provide a description of the command, explaining that it inserts your library of blocks, dimension styles, etc., into the current drawing.
- Optionally, add an image to represent the command visually.
Step 4: Customize the Command Macro String
To make the Lazy Library command work seamlessly, we need to customize the command macro string. Unlock the tool palette item by changing the “Use” flyout from “Just” to “Note.” Then, modify the command string as follows:

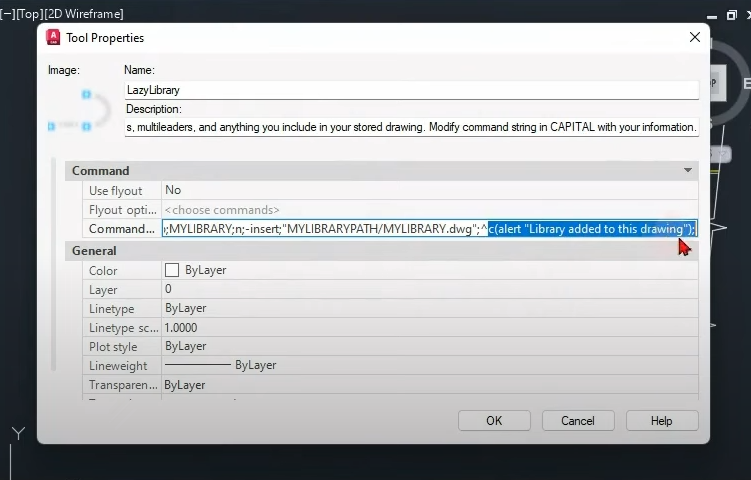
- Replace “Purge Your Library” with the name of your library drawing. (e.g., “MyLibrary”)
- Replace “YourLibraryPath” with the file path of your library drawing.
- Adjust any slashes or backslashes in the path to ensure compatibility.
- Replace “Your Library DWG” with the name of your library drawing. (e.g., “MyLibrary.dwg”)
Step 5: Test the Lazy Library Command
To test the Lazy Library command, open the dimension style manager and verify that you have only the default dimension styles. Similarly, check if you have a limited number of multi-leader styles. Now, follow these steps:
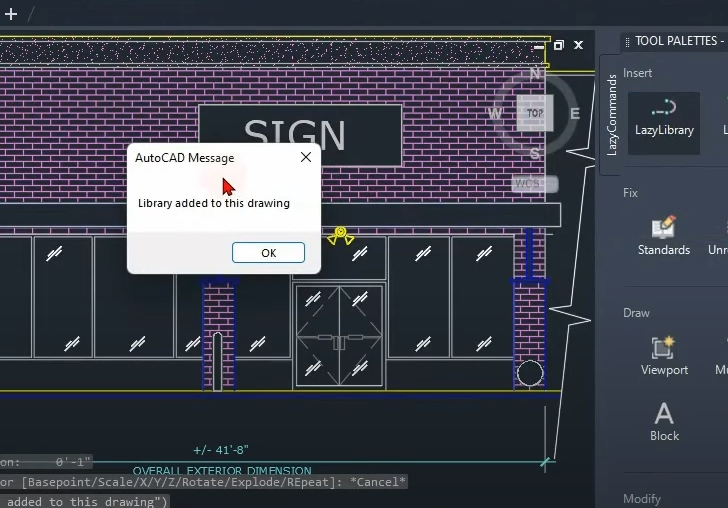
- Click on the Lazy Library command in the tool palette.
- You’ll see a prompt indicating that the library has been added to your drawing.
- Press “Enter” to accept it.
- Check your AutoCAD objects, such as dimension styles and multi-leader styles, to see that they have been automatically inserted.
Congratulations! You’ve successfully learned how to leverage the LazyLibrary command in AutoCAD to streamline your workflow. By creating a library drawing and using the customized tool palette command, you can effortlessly insert your desired blocks, dimension styles, and more into any current drawing. Say goodbye to the tedious task of copying and pasting, and embrace the efficiency of the Lazy Library command. Give it a try and experience the time-saving benefits for yourself. Happy drafting!
Useful links:
Watch this week’s video
Join our CAD meetings by becoming a YT member
Download my LazyBlocks, macros, and materials used in tutorials on Patreon-feed