Hi there! Are you looking to enhance your viewport skills for more efficient work? I used to struggle with this too, especially when I lacked the necessary drawing skills. However, I discovered a solution that simplifies the process of creating custom drawing scales.
To create a drawing scale, you can navigate to the Custom Tab, and use the following chart with scale factors that can make your life easier.
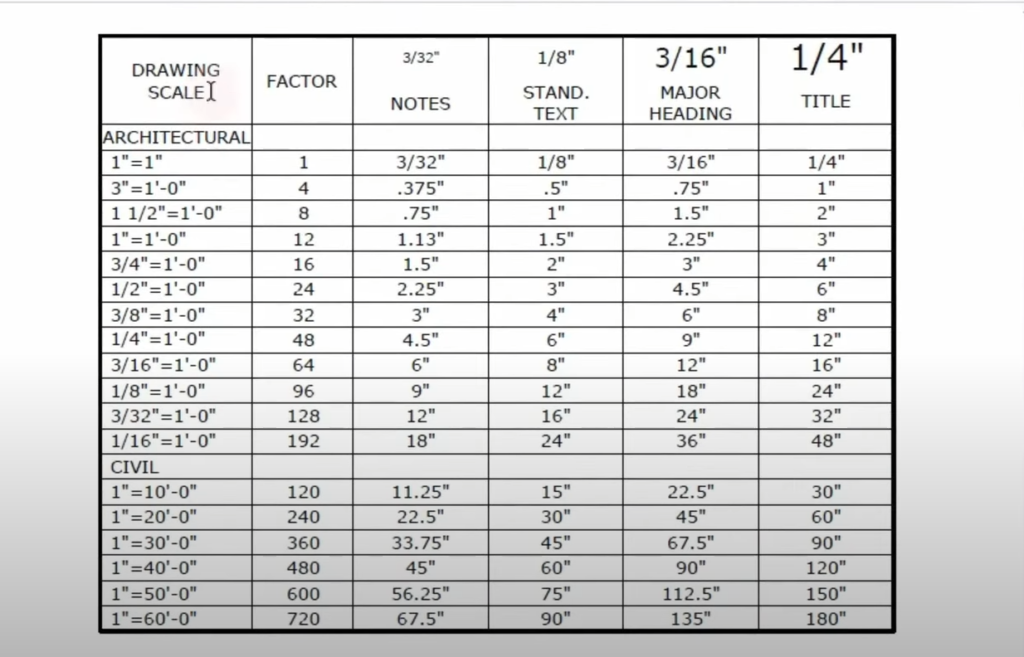
For example, let’s say we want to create a 1/8 scale, which equals one foot. We need to know the scale factor, which in this case is 96. Keep that number in mind as we proceed.
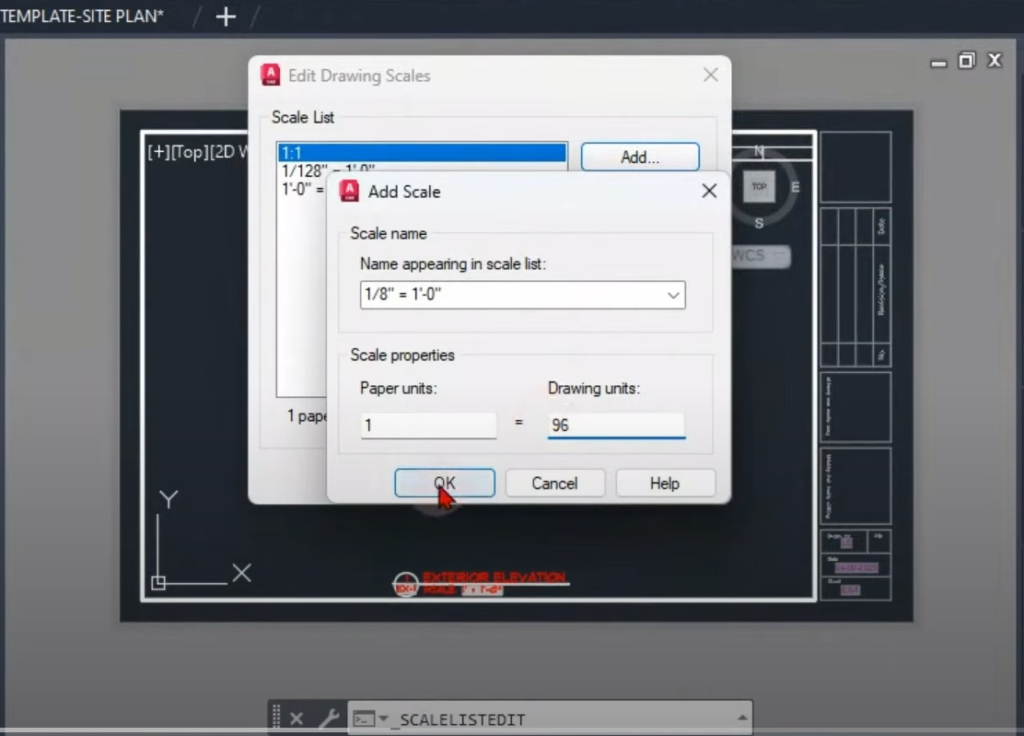
Now, let’s quickly create the scale by clicking on the “Add” option. In the scale properties, we have paper units (which should always be one) and drawing units, where we’ll use the scale factor of 96. Enter 96 in the drawing units field and click “OK.”
Once you’ve done this, click “OK” again. Now, whenever you double-click on a viewport, you can select your new drawing scale or viewport scale and adjust your drawing accordingly. However, constantly creating viewport skills for every drawing can be frustrating and time-consuming.
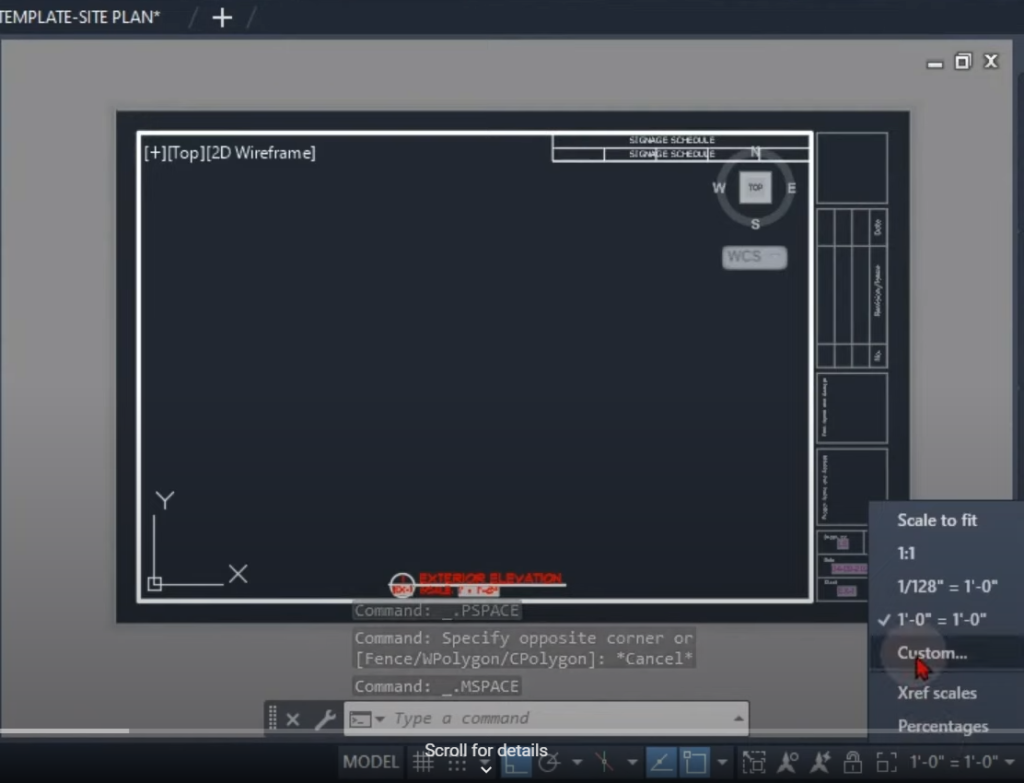
So, let’s simplify things further. If we switch to a different drawing, we won’t see the new created drawing/viewport scale. The question is, how can we create a drawing scale in one drawing and have it available in our next drawing?
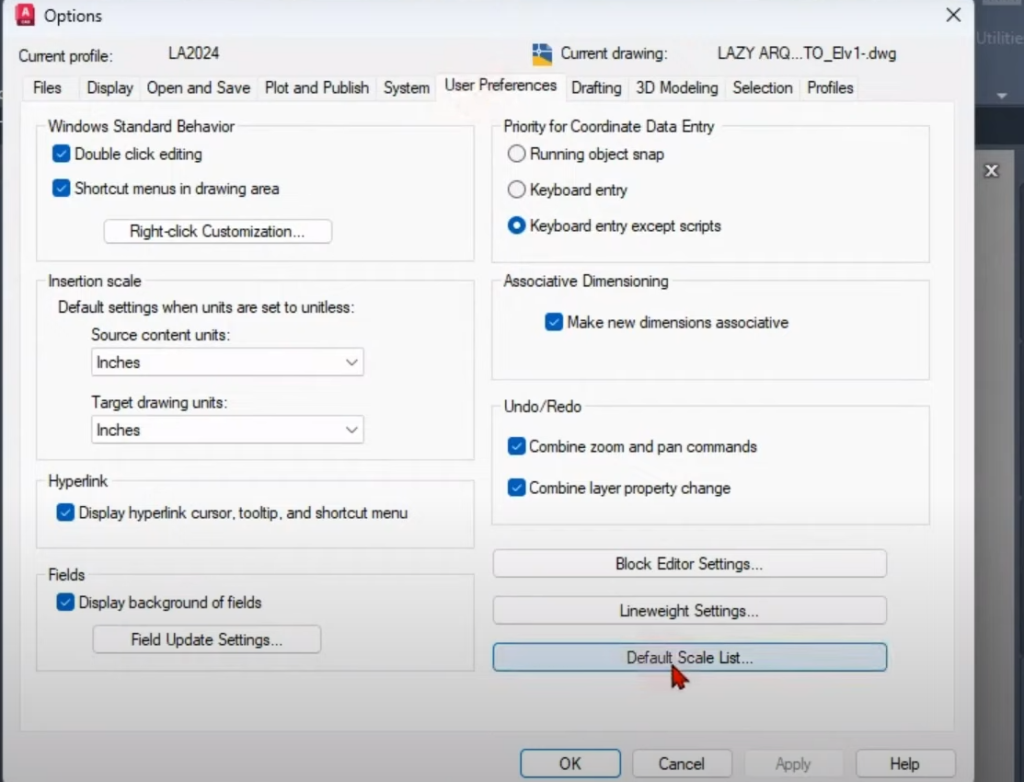
The answer lies in the options dialog box. To access it, press “Op+Enter.” In the options dialog box, we can set some preferences. Under the user preferences, you’ll find an option called “default scale list.” Selecting this option reveals many different drawing scales or viewport scales.
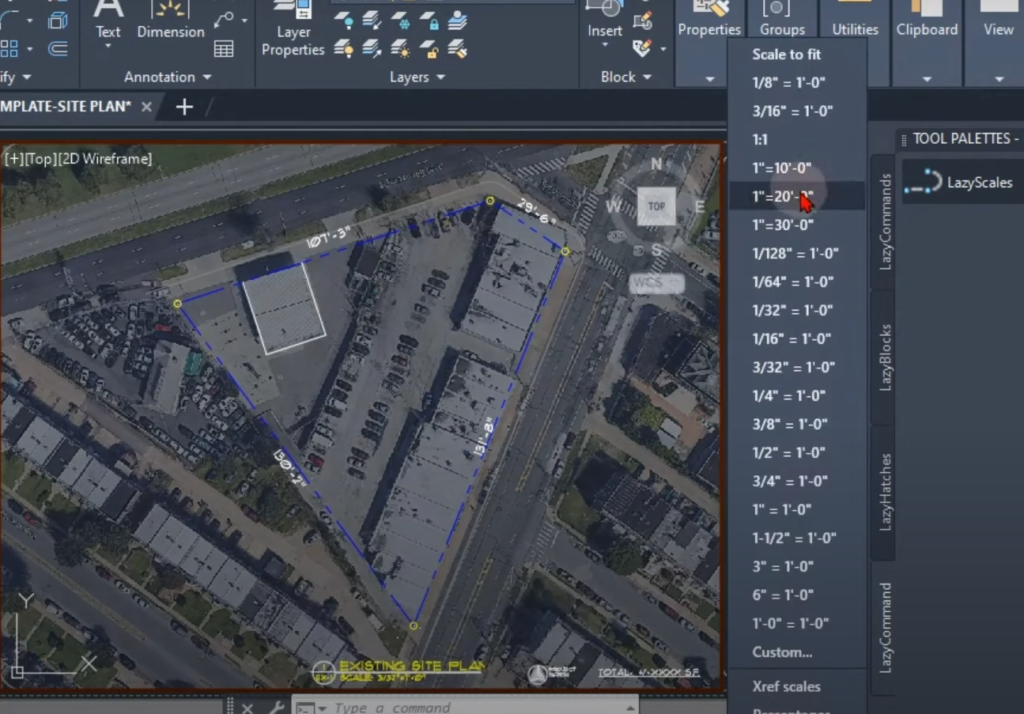
For instance, if we need engineering scales for a site plan, we can start creating them using the chart mentioned earlier. Let’s add a 1-inch scale equals 10-foot scale. The scale factor for this would be 120, as per the factor chart. Set the drawing units to 120 and click “OK.” You can quickly add a few more scales using the factor chart I shared in another live stream. Once you’re done, click “OK.”
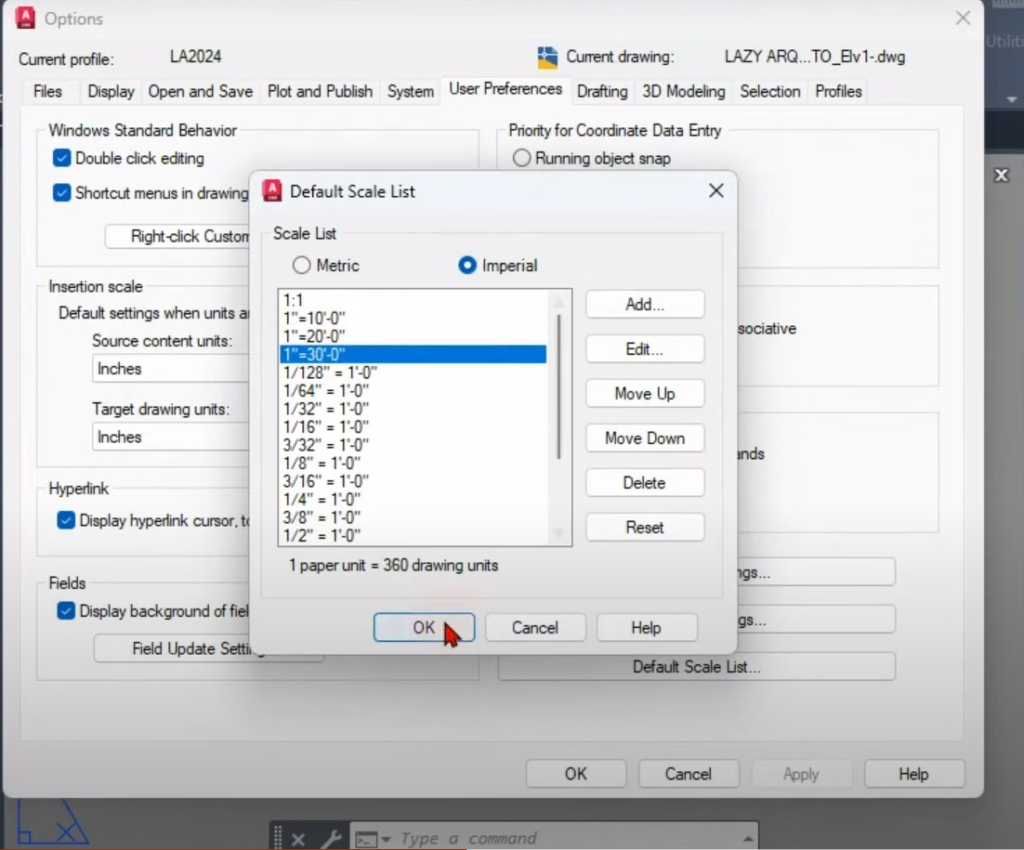
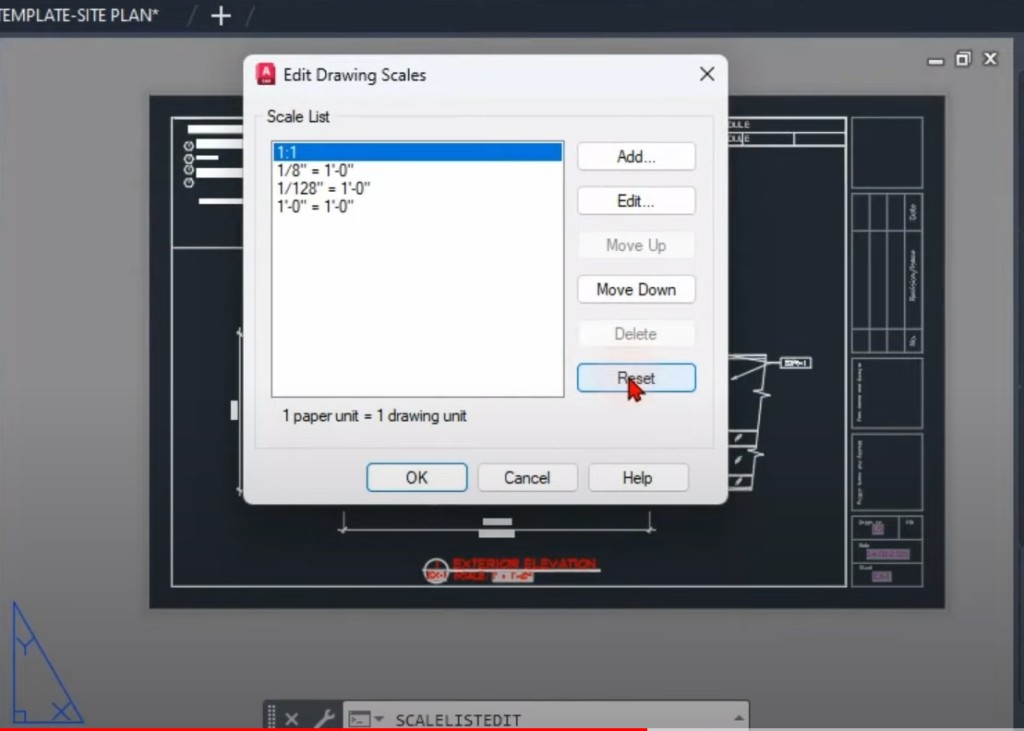
Now, here’s the crucial step. To make these drawing scales available, we need to go to the custom options and reset the drawing scales. Click on the “Reset” option, and a dialog box will appear. Choose your preferred units (e.g., imperial for the US), and click “OK.” Now, all your viewport skills will be displayed.
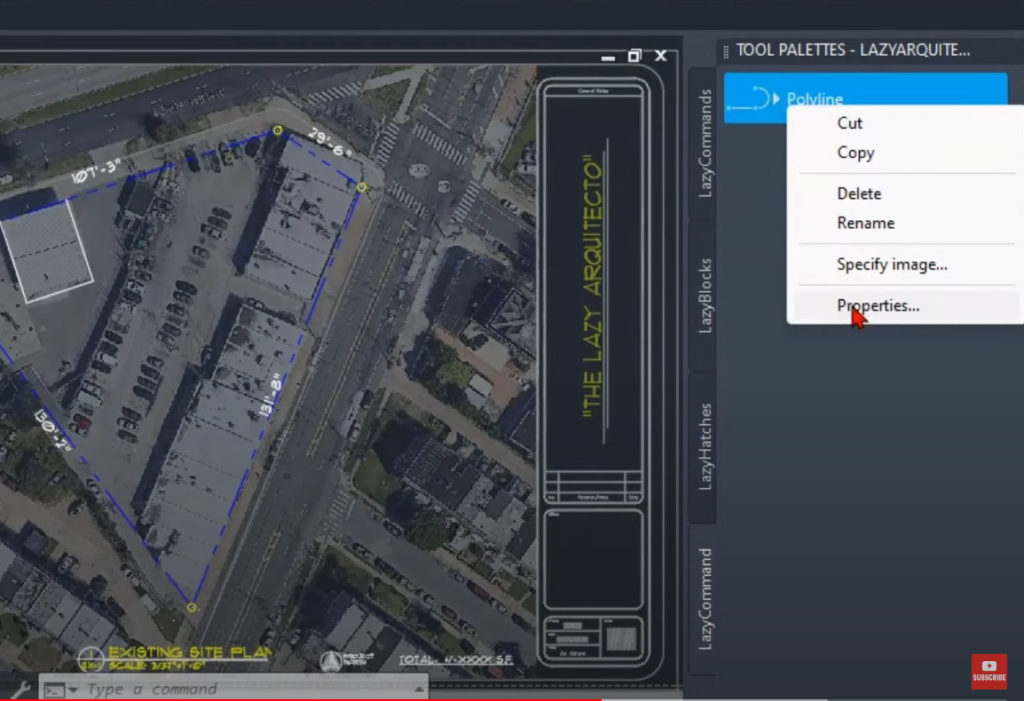
However, repeating this process for every drawing can be tedious. To make it more convenient, you can utilize the tool palette. Open it using the “Ctrl+3” shortcut. Here, you can add any tool to the palette. For example, drag and drop a polyline from the drawing onto the tool palette.
To create a command, select the properties of the polyline tool by right clicking on it.
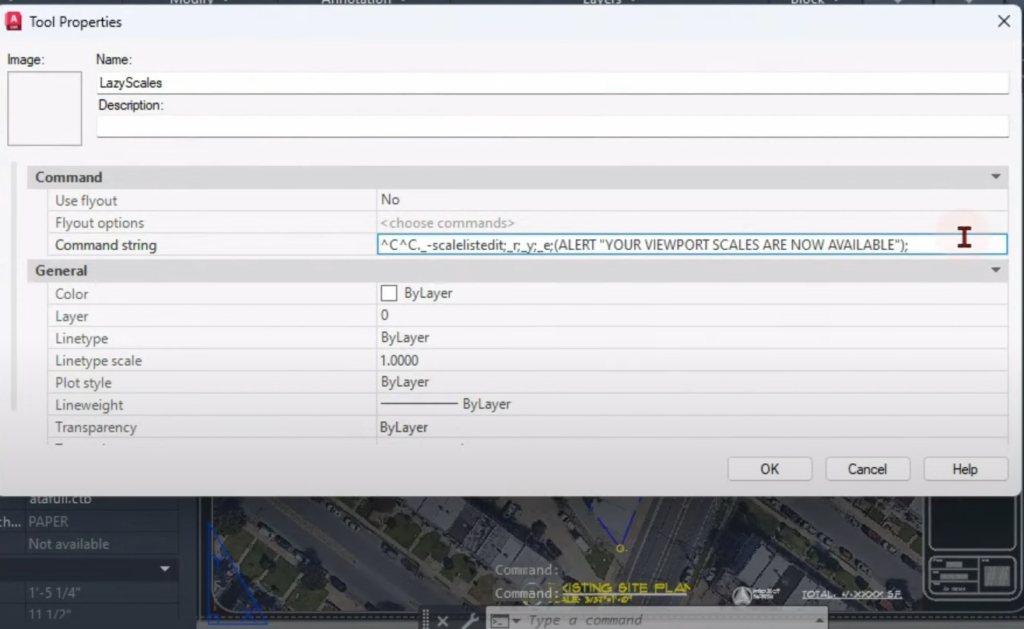
Rename the command as “LazyScales.” Now, open the command string and write the below code. This code utilizes the command “SCALELISTEDIT” to open the custom scales and follows instructions to reset the scales. It also includes a message to let you know when your drawing scales are ready. Click “OK” to save your changes.
Now, let’s test it out. If you try to select a scale and don’t find any of your civil scales, simply click on your “LazyScales” command, and you’ll see that your drawing or viewport scales are now available to use them as needed.
I hope this solution simplifies your workflow and saves you time. Let me know what you think about this command and how it has helped you improve your viewport skills.
Useful links:
Watch this week’s video
Join our CAD meetings by becoming a YT member
Download my LazyBlocks, macros, and materials used in tutorials on Patreon-feed