Hey there! Today, I want to share an exciting method I discovered for hatching areas in Autocad. Initially, I tried hatching by picking internal points, but it turned out to be a complete waste of time. Fortunately, I found another way to make the process more efficient.
Instead of individually selecting objects and attempting to hatch them, there’s a smarter method available. Let me walk you through it. As you can see, when we select all the objects and try to hatch them at once, there are some areas that remain unhatched. It’s puzzling, right?
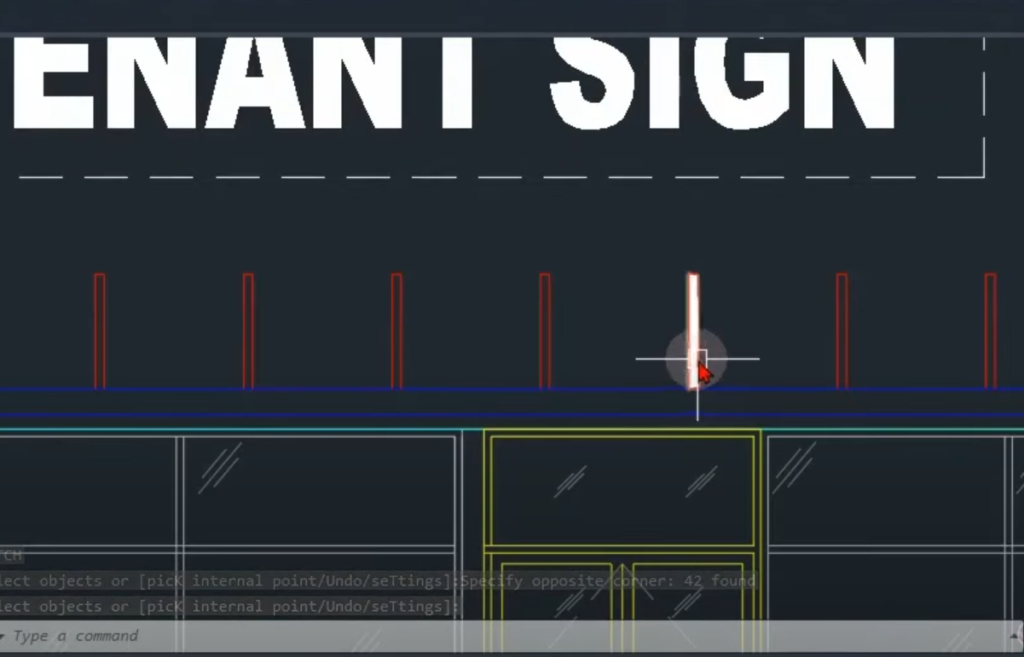
Upon closer examination, we realize that some of these areas are not closed. However, there is a particular area, the one that was successfully hatched, that is closed with four different red lines.
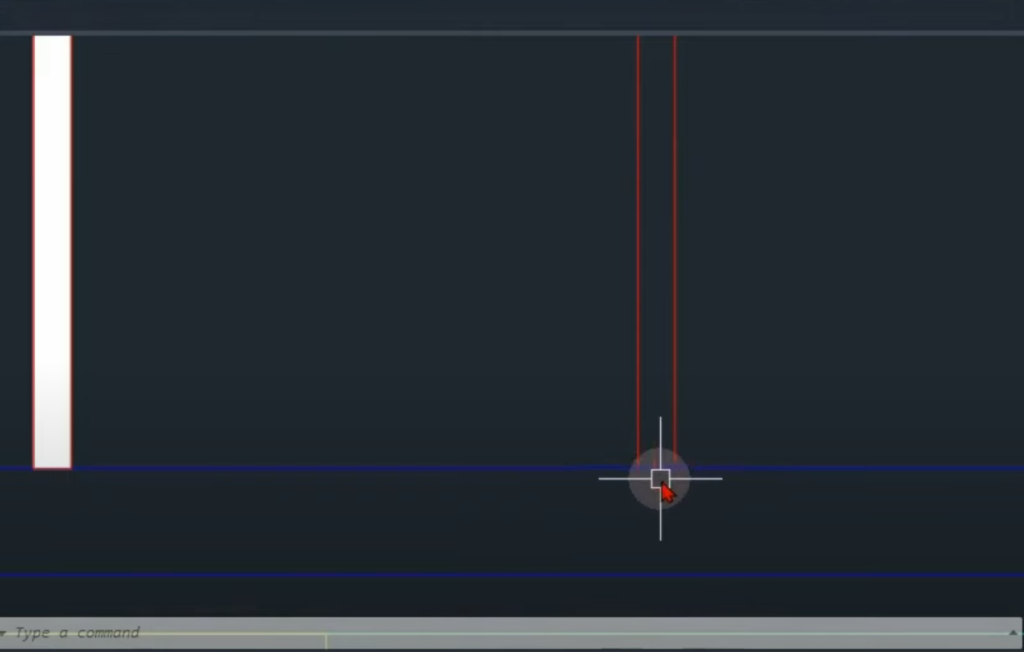
To address this issue, I developed a custom tool that enables us to close all these different areas swiftly, allowing for quick and seamless hatching.
Let’s dive into the steps involved. First, I opened my tool palettes using the shortcut Ctrl+3. Then, within the tool palettes, I created a new tool by adding a piece of text from my drawing. To do this, I simply left-clicked on the text and dragged it to the tool palette.
After completing the initial step, I right-clicked on the new tool and selected the “Properties” option.
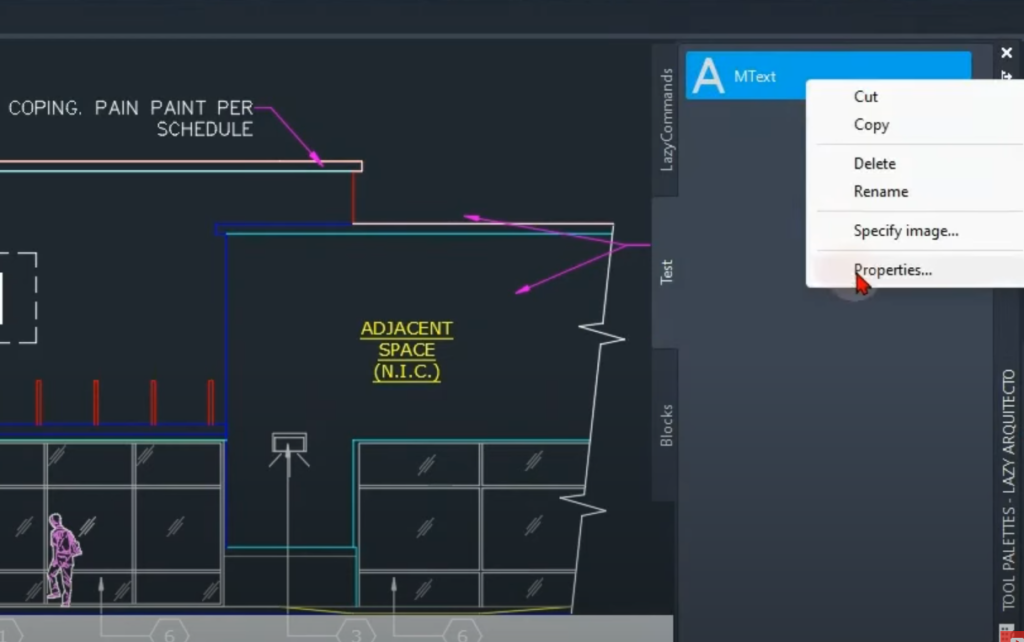
Here, I renamed the command to “LazyCap” since this tool helps us cap or close these open areas effortlessly. Additionally, I added a description for the command, which reads, “The LazyCap command closes openings formed by lines or polylines, making them a single joined item.”
The final step involved tweaking the command string. I modified the code to achieve the desired functionality. Below is the code I used, which is already posted in our Patreon post for easy copy and paste:
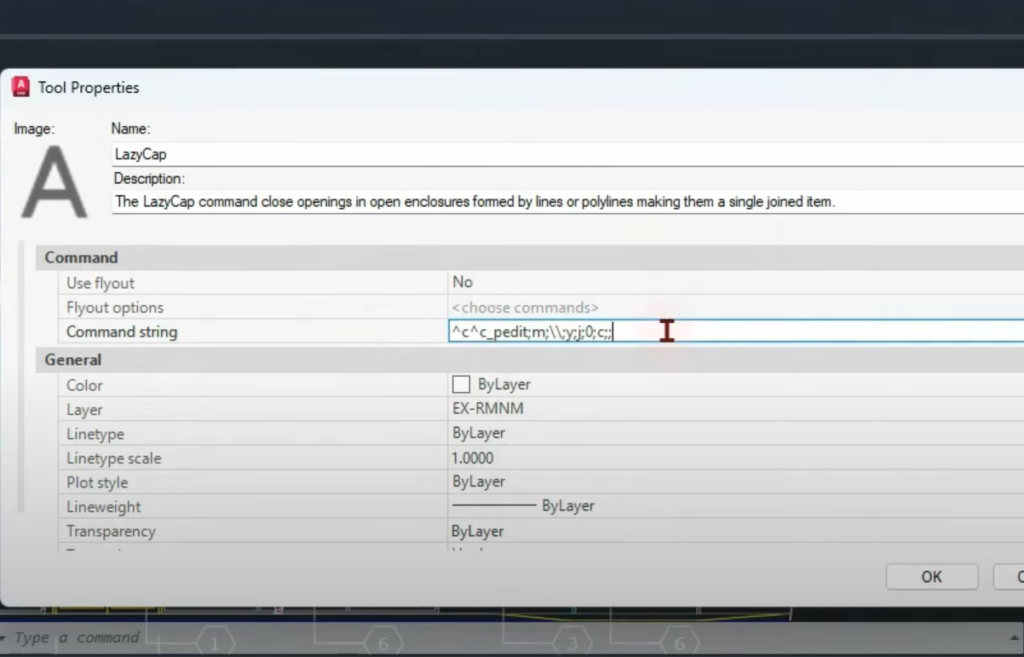
To briefly explain the code, it starts with two “^c^c” commands to stop any running command. Then, I utilized the “PEDIT” command with the option “M” for multiple selections. The double slashes “//” represent the user’s selection on the screen. By using “J” and “C” options, we can join and close the selected polylines respectively. “0” signifies the fuzz value.
With this code in place, I can now demonstrate how it works. Whenever I encounter an open area, I simply click on my new “LazyCap” command, and following the instructions to select objects, I choose all the objects that need closing. Voila! It automatically closes all the areas, as you can see.
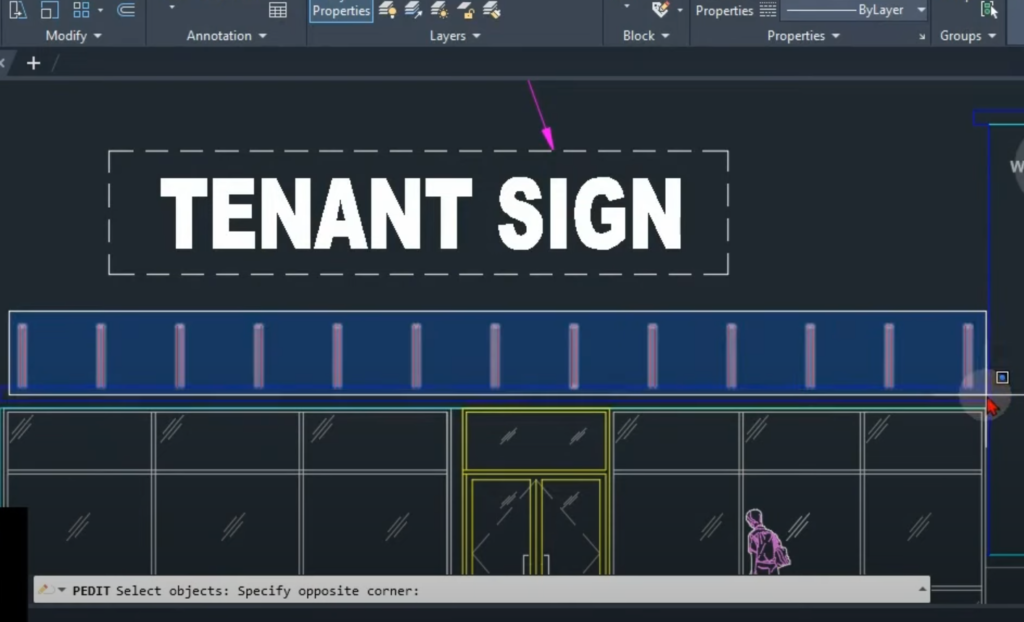
Now, the best part is that I can immediately utilize the hatch command and apply it to all the objects at once, like this
[demonstrate hatch command].
This method significantly speeds up the hatching process and saves valuable time.
I would love to hear your thoughts on this technique. Please let me know in the comments section. If you’re interested, we already have over 20 other handy commands you can explore in our Youtube channel. So be sure to check them out!
Thank you for joining me today, and until next time, happy hatching!
Useful links:
Watch this week’s video
Join our CAD meetings by becoming a YT member
Download my LazyBlocks, macros, and materials used in tutorials on Patreon-feed
