As a design professional, I understand the challenges of efficiently working with multiple elevations in AutoCAD. The cumbersome process of making changes to each elevation individually can lead to errors and confusion. However, I have devised a workflow that simplifies this process and allows for global editing of elevation information. In this post, I will share how I helped my client overcome these challenges by utilizing viewports effectively.
My Client’s Concerns: My client approached me with a common problem: working with multiple elevations in AutoCAD was causing errors and confusion. They found themselves constantly switching between elevations, making changes repeatedly, which led to inconsistencies and wasted time. Their goal was to find a way to streamline this process and globally edit elevation information.
Solving the Situation: To address my client’s concerns, I set out to find a solution that would allow for centralized elevation management. Here’s how I achieved it:
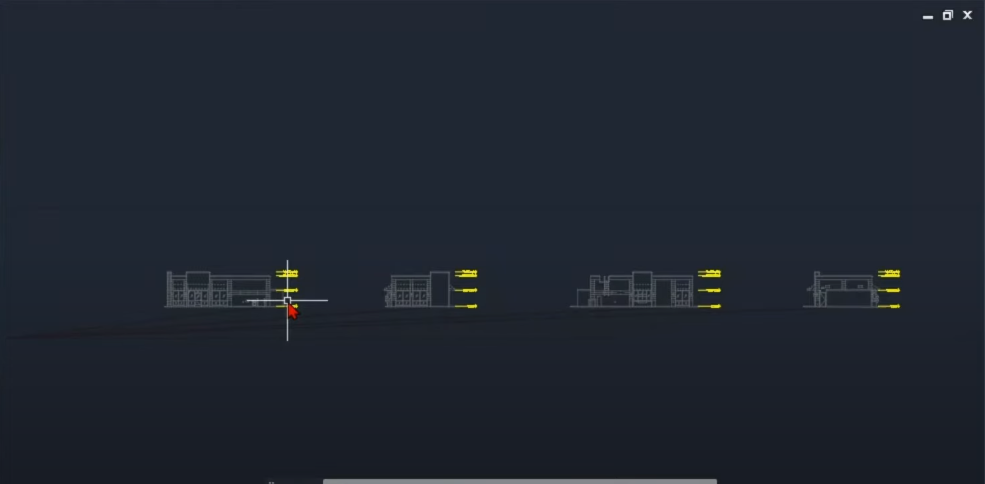
- Identifying the Main Elevation: First, I identified the primary elevation that would serve as the reference for the other elevations. In this case, it was the front elevation. I removed the redundant elevation tags, keeping only the one from the front.
- Utilizing Viewports in Paper Space: To manage the elevation tags for the other three elevations, I utilized viewports in the paper space. I selected the viewport corresponding to the main entrance building and copied it using the keyboard shortcut Ctrl+Shift+C. This allowed me to copy from the base point at the corner of the building.
- Pasting and Resizing Viewports: I pasted the copied viewport into the desired locations for the other elevations by using Ctrl+V. I adjusted the size of each viewport accordingly.
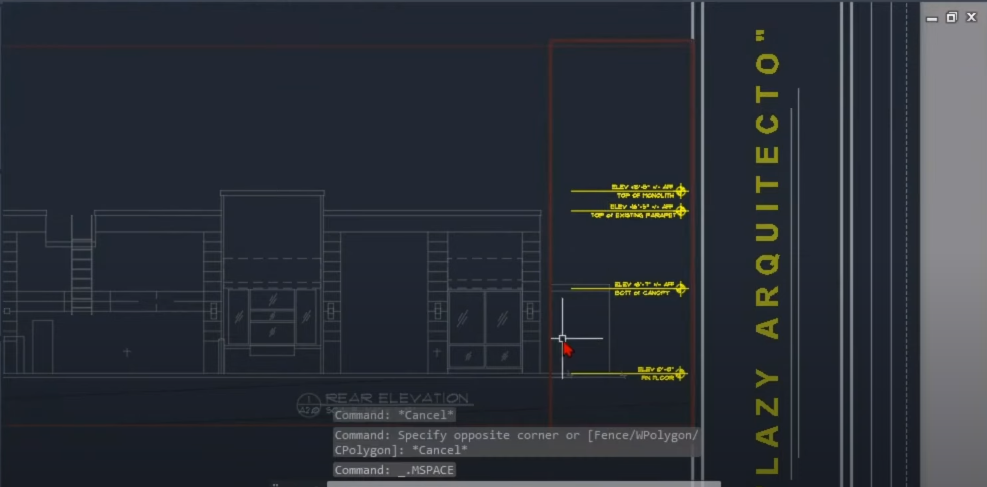
- Handling Display Issues: While pasting the viewports, I encountered a problem where items from the other main elevation were still showing. To resolve this, I double-clicked on the viewport to enter it and accessed the layer properties manager.
- Layer Management: Inside the viewport, I checked the layer for the elevation tag. Once identified, I selected all the layers using Ctrl+A and held the Ctrl key to additionally select the elevation tag layer.
- Freezing Layers: Next, I found the option to freeze the selected layers or viewport freeze. By clicking this option, I ensured that only the elevation tags were visible within the viewport.
- Duplicating the Workflow: To complete the process for the remaining elevations, I double-clicked outside the viewport, copied it using Ctrl+Shift+C, and pasted it into the other elevation locations. I repeated the layer freezing steps for each viewport, customizing the view as required.
The Benefits: By implementing this workflow, my client could now modify elevation information in one location, and the changes would automatically update across all the elevations. This saved them time, reduced errors, and eliminated confusion.

Utilizing viewports effectively can greatly enhance the efficiency of working with elevations in AutoCAD. By consolidating elevation management in one place and utilizing the power of global editing, design professionals can streamline their workflow and improve productivity. Give this workflow a try and see how it simplifies your elevation management process.
Useful links:
Watch this week’s video
Join our CAD meetings by becoming a YT member
Download my LazyBlocks, macros, and materials used in tutorials on Patreon-feed
Great delivery. Great arguments. Keep up the great effort.
Hello, and thank you! Join our community live this Sunday