Introduction:
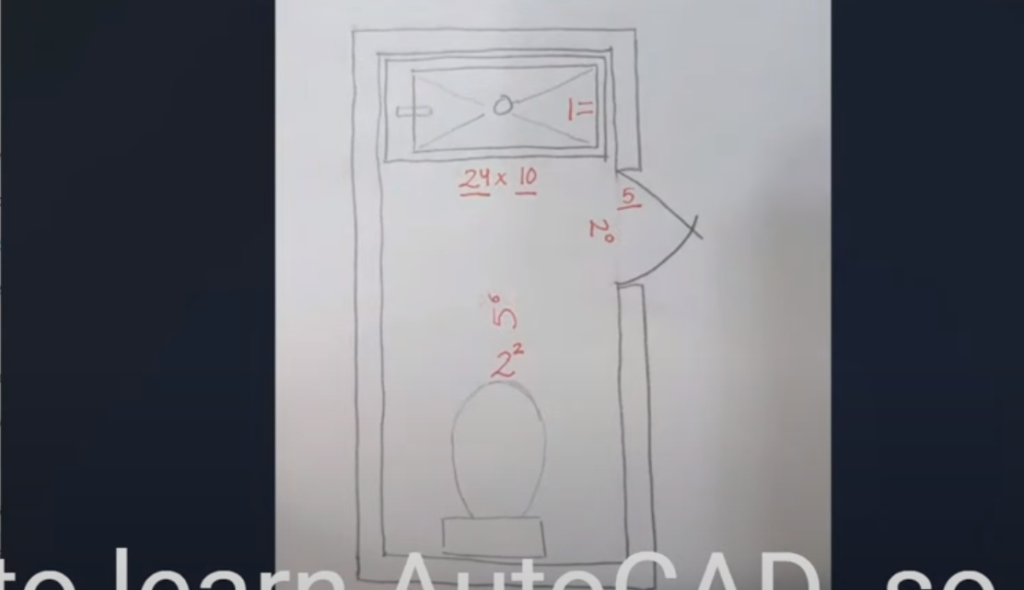
Hi there! I’m Irving, a certified AutoCAD certified. Today, I’ll be showing you how to learn AutoCAD 2024 in just a few minutes. I conducted a survey to gather the necessary information to draw an existing restroom, and I’m sharing all the files with you here so you can follow along. Let’s get started!

Interface:
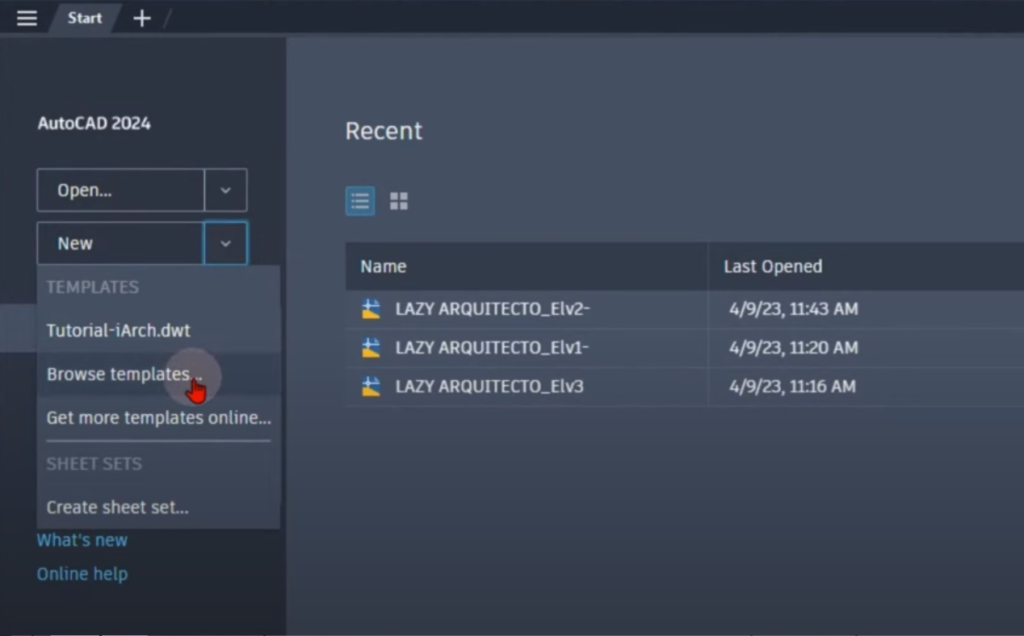
When you open AutoCAD 2024, the first thing you’ll see is the interface. To open an existing drawing, click on the “Open” option. However, for this tutorial, we’ll be working with a new drawing. To create a new drawing, click on the “New” option and select the appropriate template. In our case, we’ll choose the Imperial architecture template since it uses feet and inches as the unit of measurement. AutoCAD will automatically set up the units for us, saving us the trouble. When you open a drawing for the first time, you’ll be in the paper space environment. In AutoCAD, there are two main environments: paper space and model space. Model space is where we’ll be doing most of our drawing, while paper space is used for printing and creating PDFs.

Model Space:
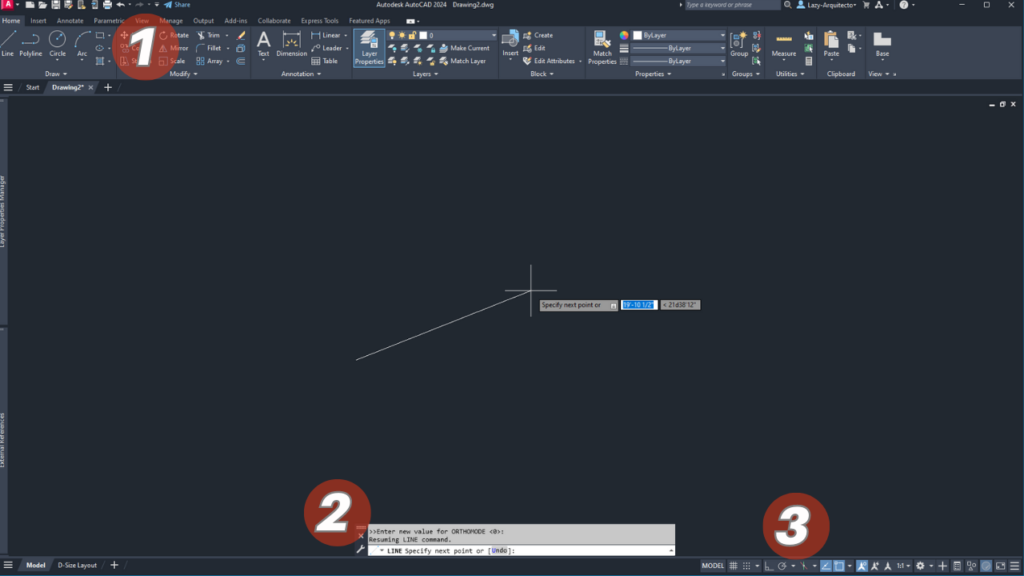
In model space, we have three important elements on the interface. The first is the ribbon, which contains most of the tools and commands for drawing and modifying objects. Below the ribbon, we have the command line, which acts as our guide and provides instructions for each command. For example, when we start a command like the line command, the command line immediately changes and instructs us to specify the first point. We can then click on the screen to select the first point and continue with the command. To finish a command, we can press Enter or Escape. The third important interface element is the status bar located at the bottom. It contains settings such as precision settings for commands. For example, we can activate the ortho mode from the status bar to draw straight lines.

Navigation:
Now let’s learn how to navigate within AutoCAD. To zoom in or out, simply scroll the middle mouse wheel. To pan, hold down the middle mouse wheel and drag the cursor. To zoom extents and view your entire drawing, double-click the middle mouse wheel.
Saving:
It’s important to save your drawing regularly. To save your drawing, you can use the Ctrl + S shortcut on your keyboard. If you’re saving the drawing for the first time, you’ll be prompted to provide a name for the file. Give it a meaningful name and click Save.
Drawing Exercise – Rectangle:
Let’s start with a drawing exercise using the rectangle command. Instead of using the ribbon, we’ll use keyword shortcuts for faster workflow. The shortcut for the rectangle command is “rec.” After pressing Enter, follow the instructions provided in the command line. Specify the first corner by clicking anywhere on the screen. Next, select the dimensions option and enter the length and width of the rectangle based on our survey. For example, we can enter “2’2” for length and “5’6” for width. Finally, click anywhere on the screen to specify the other corner and complete the rectangle.

Drawing Walls – Offset:
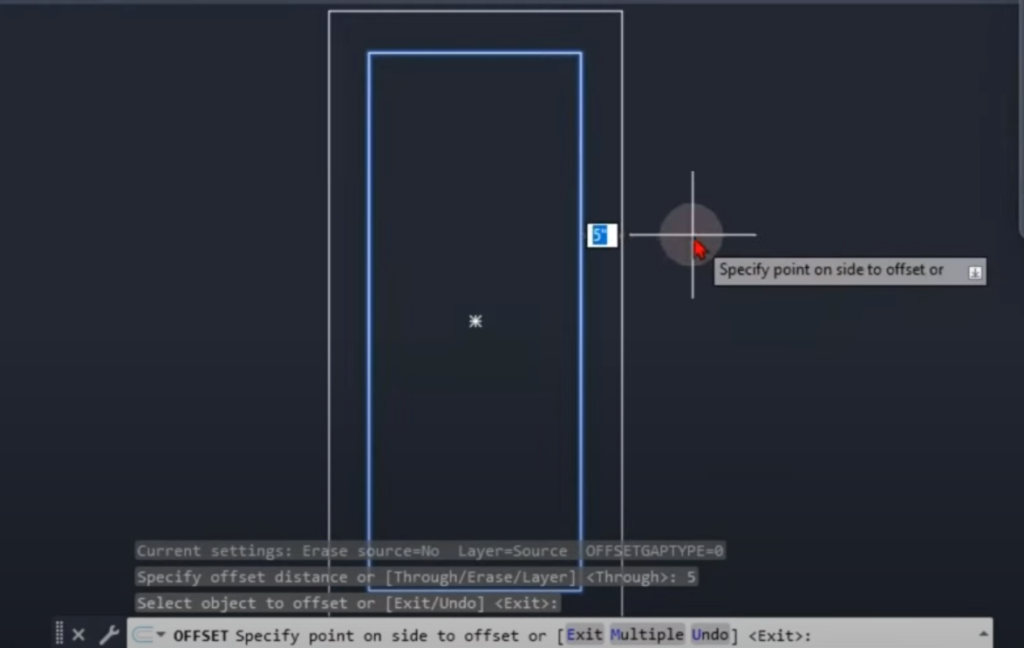
To draw the walls, we’ll use the offset command. The shortcut for offset is “o.” With the offset command, you can create parallel lines of an object. In this case, we’ll create an offset for the wall. Use the “o” shortcut and specify the offset distance, which is 5 inches in our survey. Then select the object to offset, which is the rectangle representing the wall.

Adding doors and plumbing fixtures:
Follow along with the video to finalize the drawing exercise.
Conclusion:
In this brief tutorial, we covered the AutoCAD 2024 interface, navigation, saving files, and basic drawing commands to get you started drawing in Autocad effectively!
Useful links:
Watch this week’s video
Join our CAD meetings by becoming a YT member
Download my LazyBlocks, macros, and materials used in tutorials on Patreon-feed

Help me to learn AutoCAD!!!!Civil 3D!!!!
Hello Eduardo, Join our community live this Sunday to help you