Hey there, fellow AutoCAD enthusiasts! Today, I want to share a nifty trick to solve a common problem: rotating text within AutoCAD blocks. You see, sometimes when we rotate a block, the accompanying text rotates as well. But fear not, I’ve got a solution that will help you fix this issue. Let’s dive in and learn how to overcome this challenge together.
Step 1: Adding an Attribute Definition:
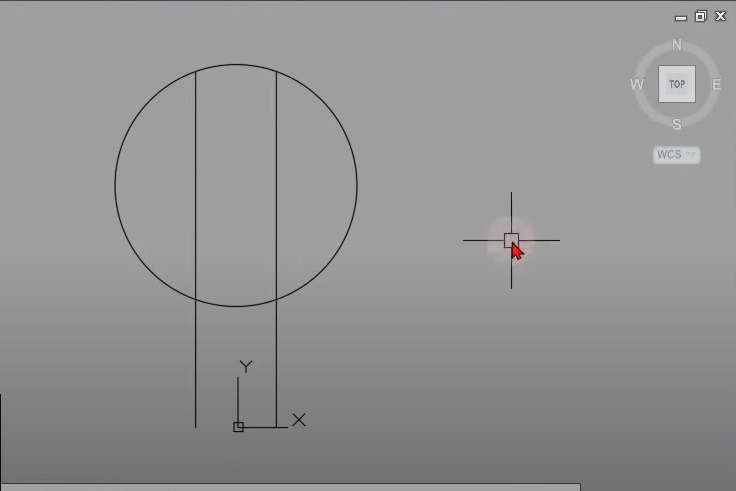
To begin, let’s take a look at a block containing some text. In this example, I’ll use a receptacle block. However, you can apply the same technique to any block in AutoCAD. Double-click on the block to enter the block editor. Then, click “Accept” to proceed.
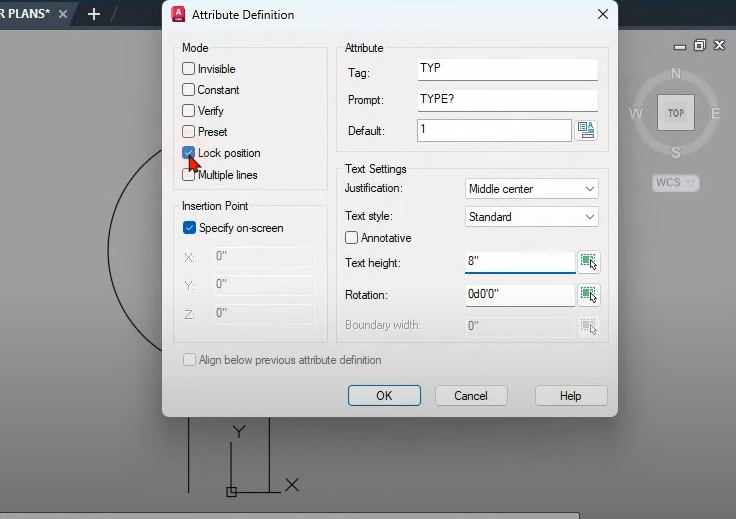
The first step is to add a piece of text as a smart attribute definition. To do this, simply use the ATT shortcut on your keyboard. This will open the attribute definition dialog box. In the dialog box, specify the attribute abbreviation (e.g., “Type”) and the prompt (e.g., “What type is this receptacle?”). You can leave the default values for justification, text style, and height. Make sure the “Lock Position” option is checked. Once you’re done, click “OK.”
Step 2: Placing the Attribute:
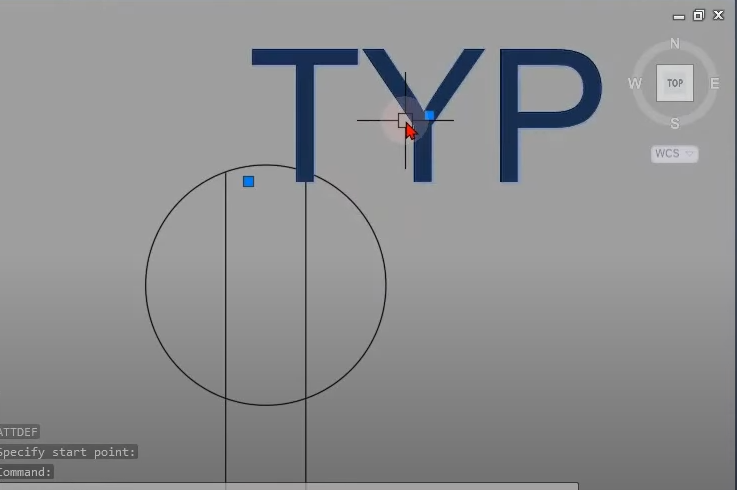
Now, you need to specify the starting point for your attribute. It doesn’t matter where you place it initially, as you can always move it later. For this example, I’ll position it near the receptacle. Left-click and place the attribute where desired. Remember, you can always click and drag it to adjust its position later.
Step 3: Adding Parameters and Actions:
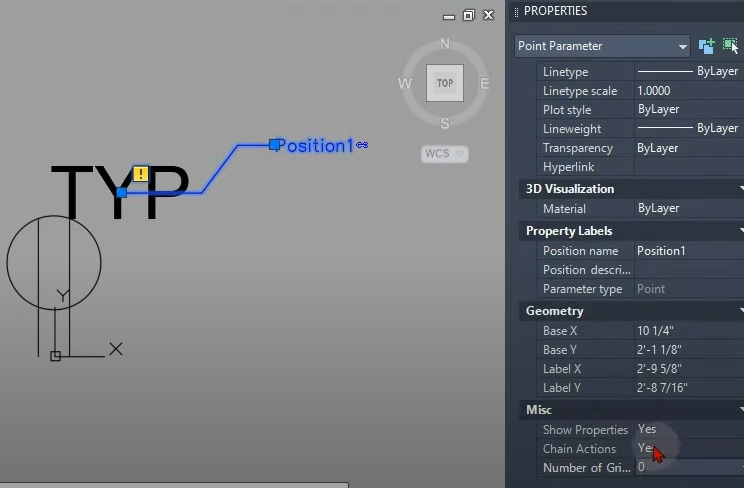
Next, we’ll add parameters and actions to ensure our text remains horizontally aligned during rotation. Activate the authoring palette from the ribbon if it’s not already visible. We’ll start by adding a point parameter. Click on the point parameter option and specify the location by snapping it to the center of the attribute. Then, specify the label location.

Please note that an exclamation mark may appear next to the parameter. Don’t worry, it simply means that an action is missing. To address this, modify the chain action from “No” to “Yes” and change the number of grips from one to zero in the Misc section of the properties palette with the point parameter selected.
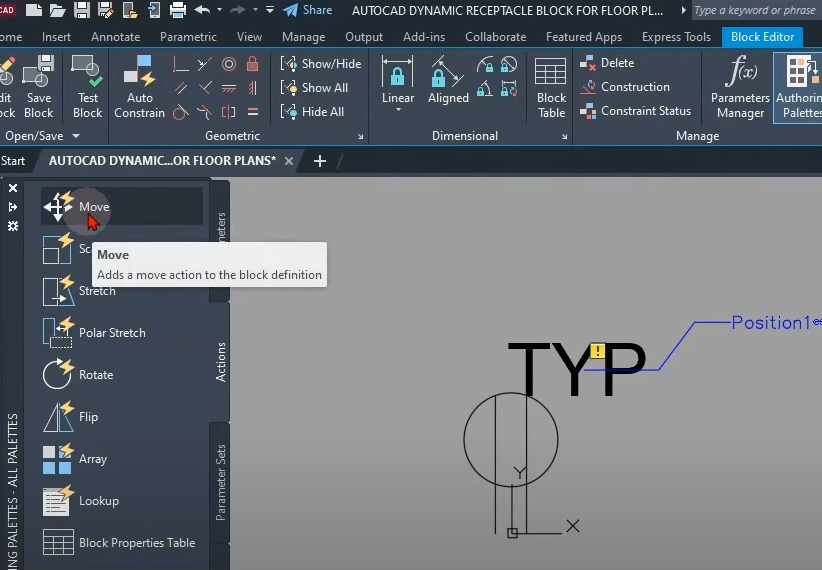
Now, let’s add an action to the point parameter. Choose the “Move” action, select the parameter, and then select the objects (the attribute and the point parameter). This will ensure the attribute remains in place during rotation. Once completed, the exclamation mark should disappear.
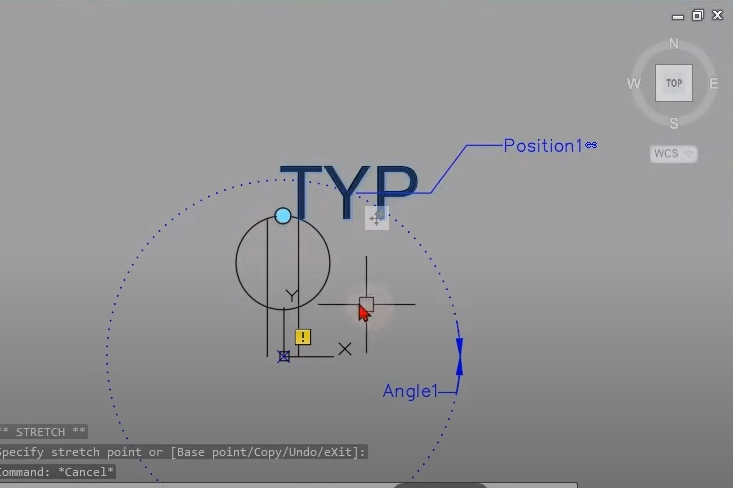
To enable rotation, we’ll create a rotation parameter. Access the authoring palette, go to the parameters section, and add the rotation parameter. Specify the base point at the origin (0,0) or snap to it. Then, set the default angle for rotation. Make sure to move the grip of the rotation parameter to the desired position (in this case, over the receptacle).
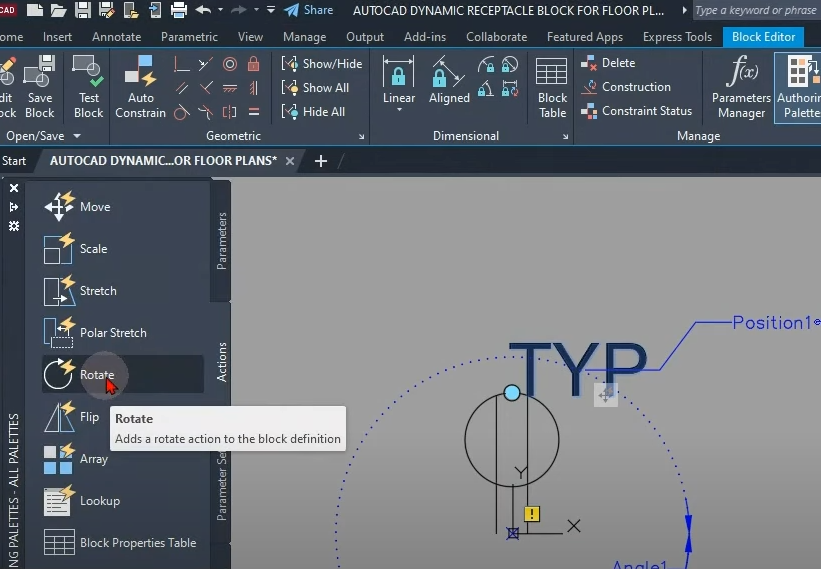
Similar to before, an exclamation mark may appear due to a missing action. To resolve this, select the “Rotate” action, choose the rotation parameter, and create a selection by excluding the attribute. Press Enter to complete the action and eliminate the exclamation mark.
Step 4: Testing the Block:
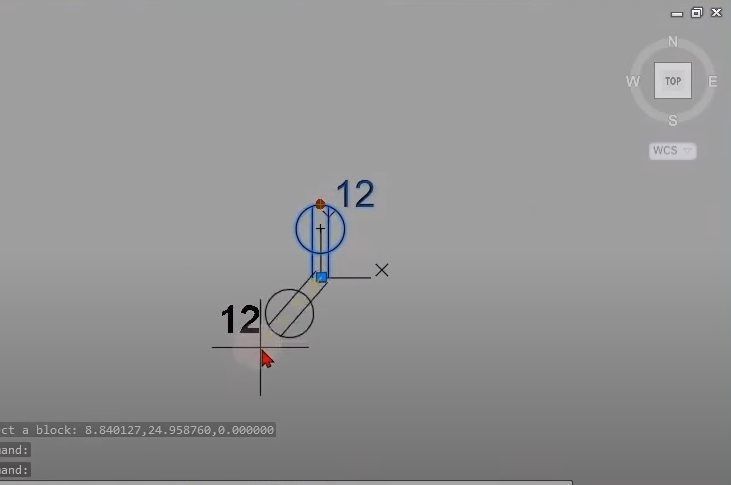
Now that we’ve added the necessary parameters and actions, it’s time to test our block. Double-click on the attribute within the block to bring up the attribute editor. Enter a value, such as 12, and see if the text rotates cleanly without affecting the block geometry. If all looks good, exit the block editor and save your changes.
Step 5: Syncing the Block:
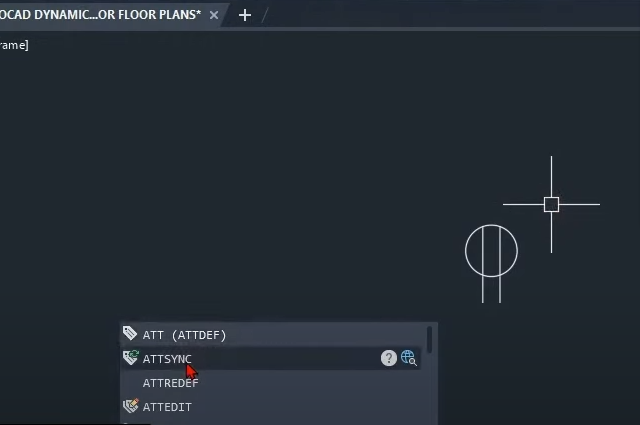
After exiting the block editor, you may notice that the attribute doesn’t appear when you double-click on the block. This is because we need to sync the block with the ATTsync command. Simply type ATTsync in the command line, select the block, and the attribute will become visible when you double-click on the block again.
Congratulations! You’ve successfully learned how to fix rotating text within AutoCAD blocks. This technique will enhance your workflow and save you time. I hope you find this tip useful in your AutoCAD projects. Remember, mastering AutoCAD is all about exploring different techniques and discovering creative solutions. Happy designing!
Useful Links:
Watch this week’s video
Join our CAD meetings by becoming a YT member
Download my LazyBlocks, macros, and materials used in tutorials on Patreon-feed