Hey there, welcome back to another Lazy Show! Today, I want to share with you a fantastic solution I created to simplify my client’s life by using dynamic CAD blocks. My client wanted a sink block that he could easily insert and align in any corner, display the sink’s size, and more. So, I got to work and built a dynamic block that exceeded his expectations. Let me walk you through the process.
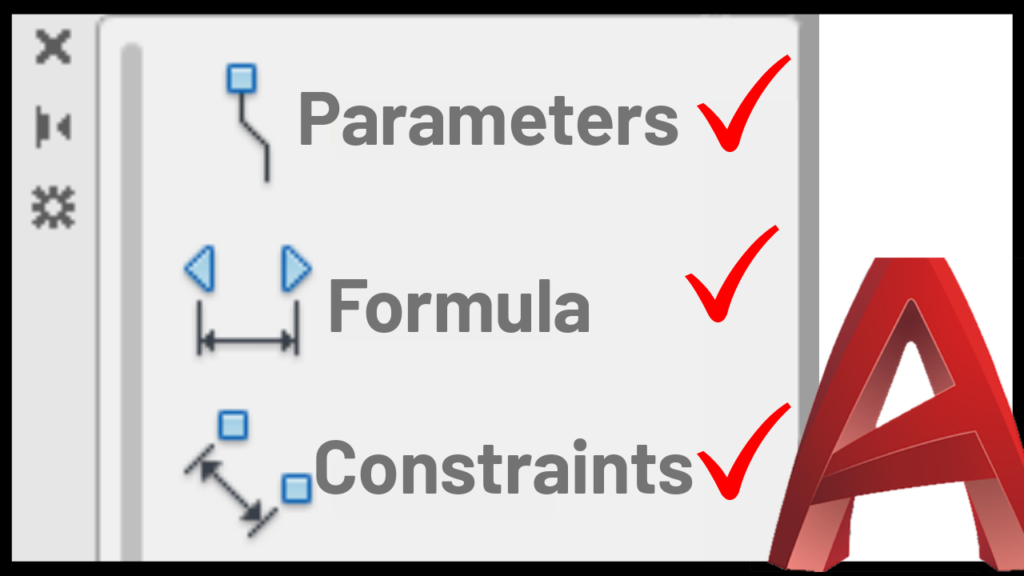
Step 1: Creating the Dynamic Block
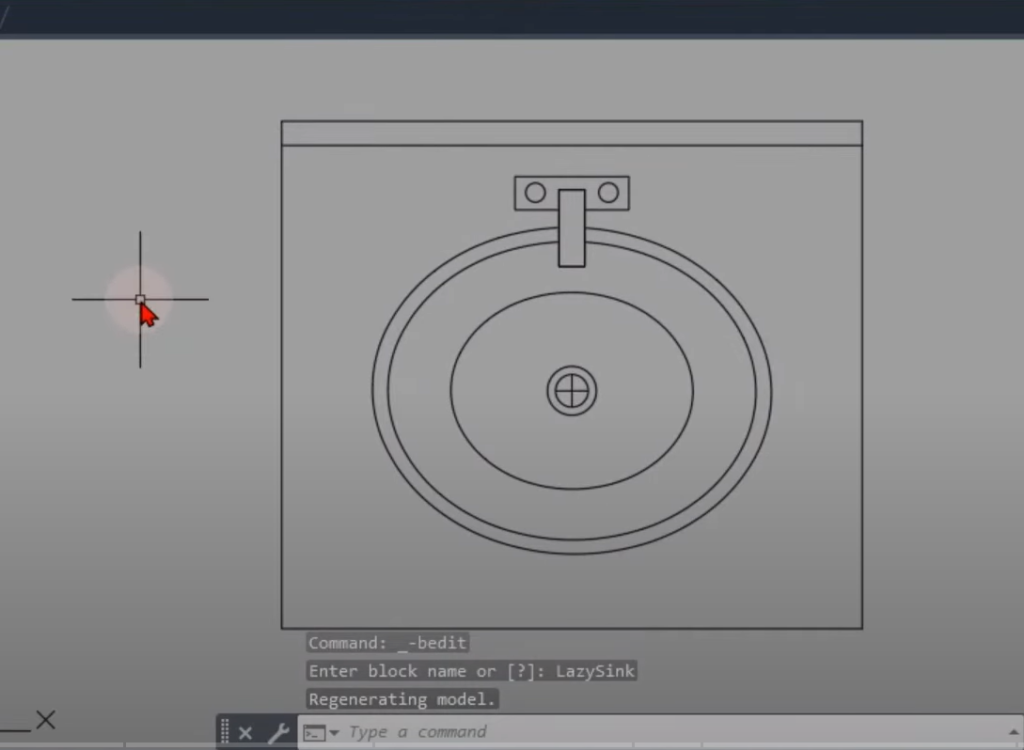
To start, I copied the static sink block my client provided and rotated it to the correct angle using the Block Editor. Then, I exploded the block to get individual lines. With these lines, I created a new dynamic block called “Lazy Sink” with the “Open in Block Editor” option checked.
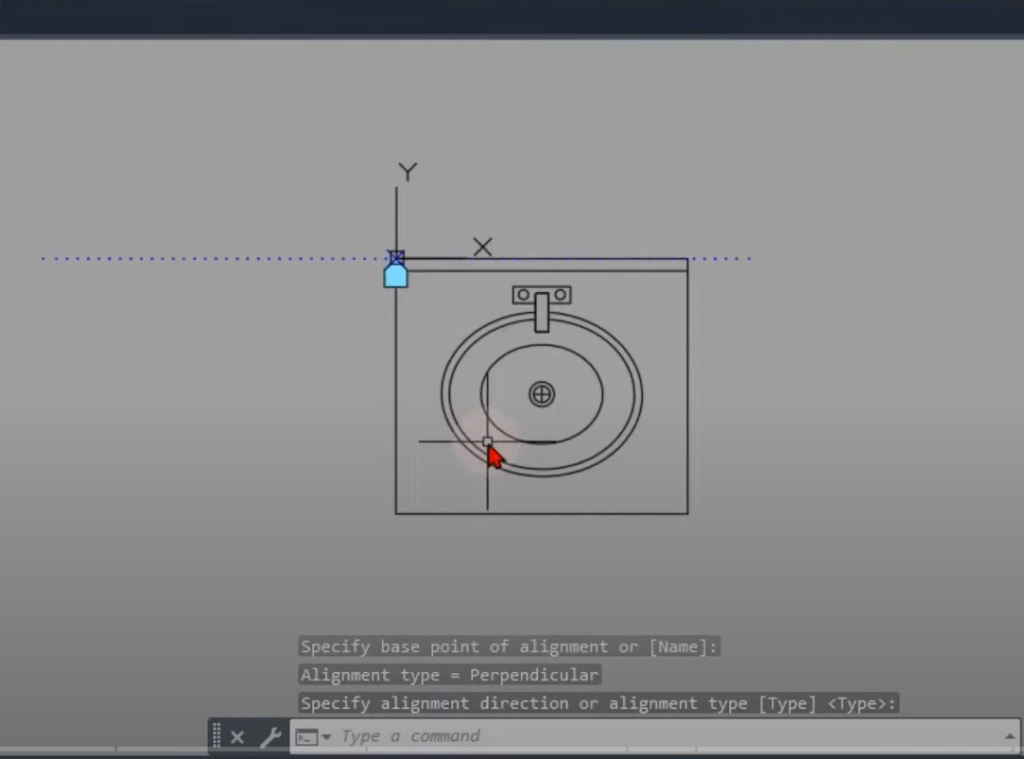
Step 2: Aligning the Block
The first feature I implemented was the ability to automatically align the sink block with a specific wall angle. I used an alignment parameter, which allowed my client to select a location on the block and align it to the desired wall.
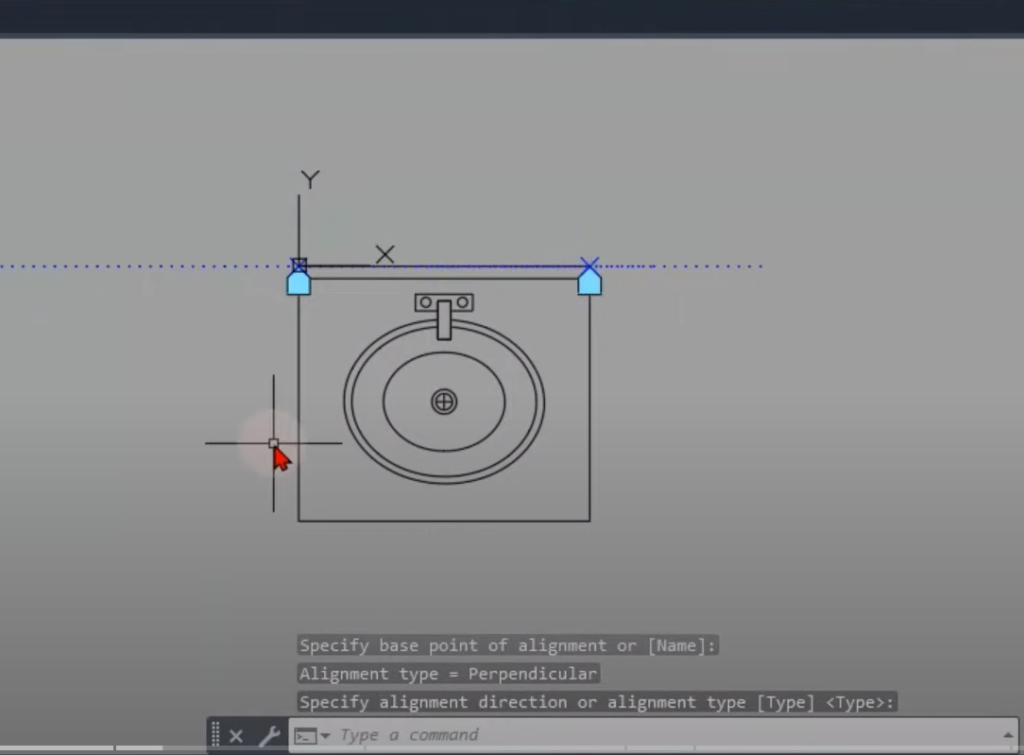
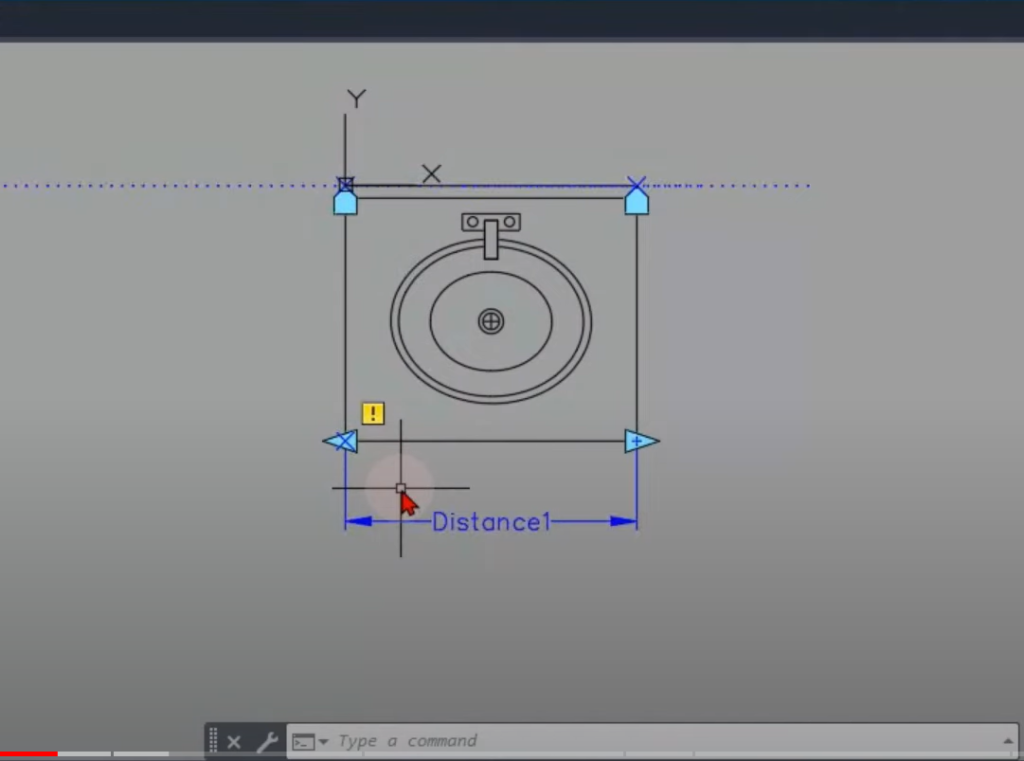
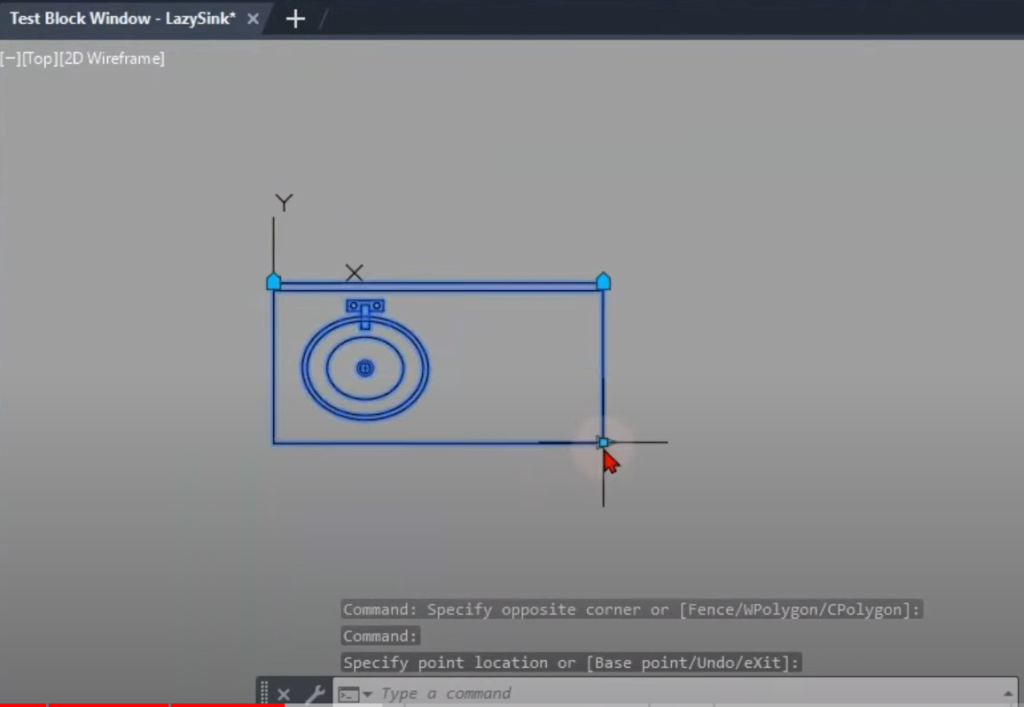
Step 3: Flexible Corner Placement
Next, I wanted to enable my client to place the sink block in any corner with precision. To achieve this, I introduced another alignment parameter for the opposite corner. This way, he could use the control key to move the base point and place the block exactly where he wanted.
Step 4: Changing the Sink Width
To provide even more flexibility, I allowed my client to adjust the sink’s width. I used a linear parameter that lets him specify the start and end points to stretch the block as needed.
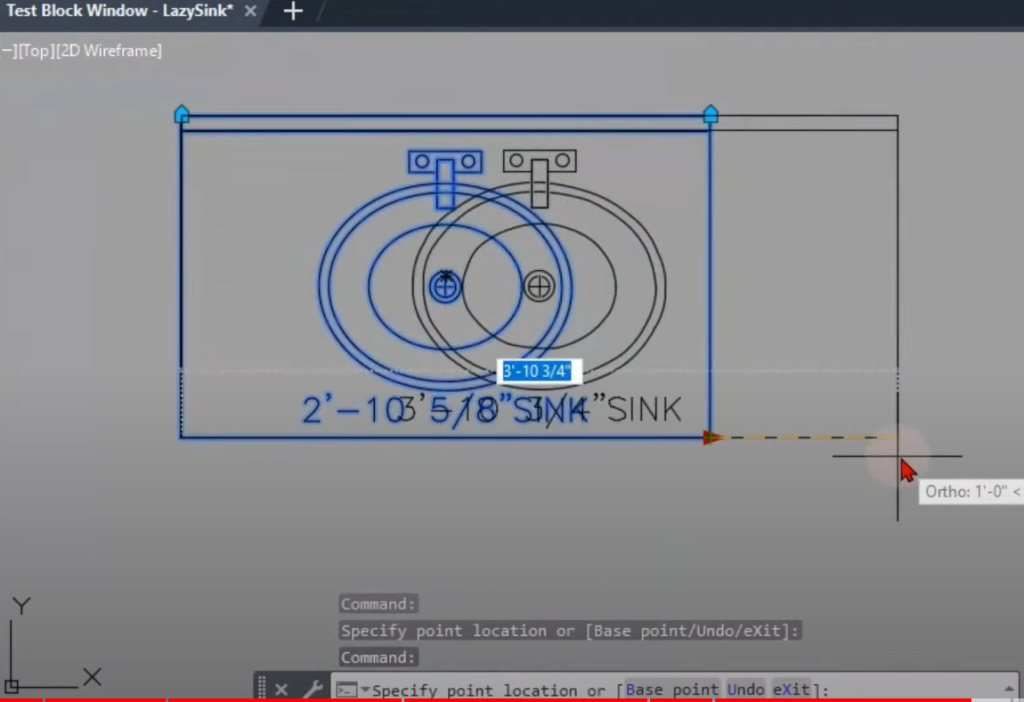
Step 5: Keeping the Bowl Centered
While the block was stretching correctly, the sink’s bowl wasn’t staying centered. To fix this, I added a move action to keep the bowl centered when stretching the sink. I set the distance multiplier to 0.5 to ensure the bowl maintained its position within the block.
Step 6: Displaying the Sink Size
For the final touch, I wanted my client to see the sink size immediately without any additional steps. I initially tried using a field, but it required regenerating the drawing to update. So, I switched to using a dimension instead. I included the dimension in the stretch action, and this allowed my client to see the real-time size of the sink.
Conclusion
By building this dynamic CAD block, I successfully simplified my client’s life. Now, he can effortlessly align the sink with different wall angles, place it in any corner, adjust the sink width, and view the sink size in real-time. Dynamic blocks are incredibly powerful and can save time and effort for CAD users.
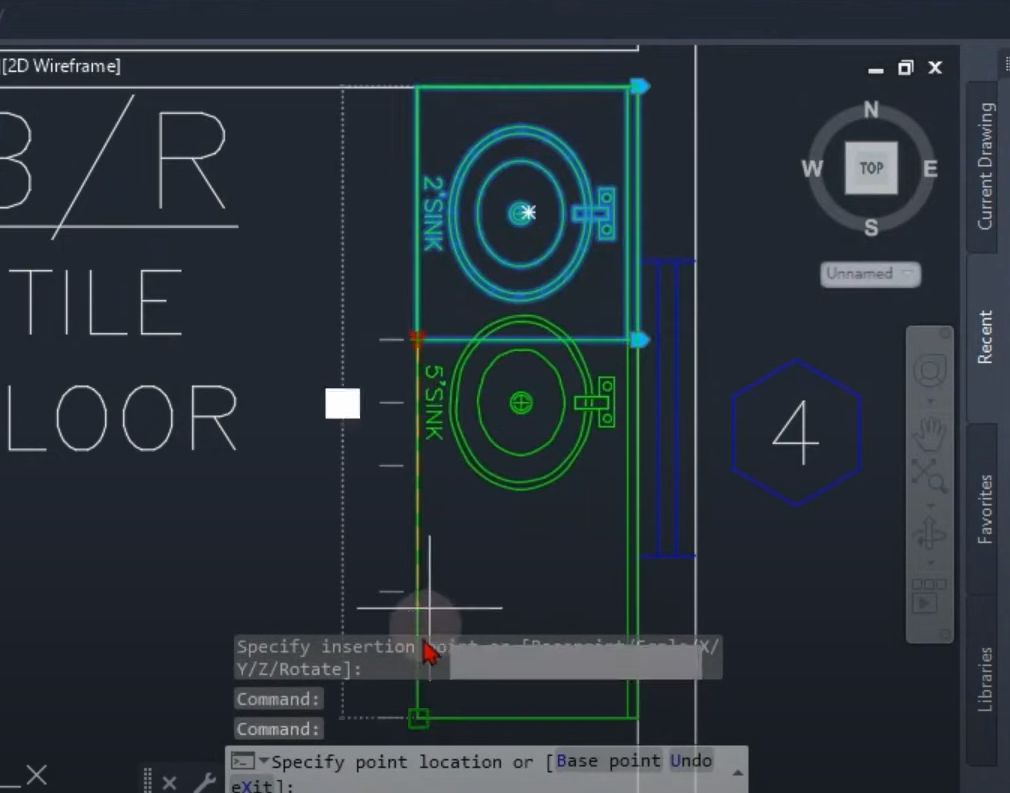
So, the next time you face a repetitive task or need to streamline your workflow, consider creating dynamic blocks to simplify your life too! Happy designing!
Useful links:
Watch this week’s video
Join our CAD meetings by becoming a YT member
Download my LazyBlocks, macros, and materials used in tutorials on Patreon-feed